Save
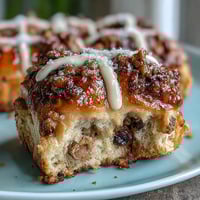
Save Imagine starting your day with a breakfast that tastes exactly like a decadent peanut butter cup but provides a powerful protein boost. This Peanut Butter Cup Protein Pancake Bowl is a warm, gooey, and satisfying alternative to traditional pancakes, baked to perfection in a single-serve bowl. It's the ultimate 'dessert-for-breakfast' treat that keeps you fueled and focused.
Save Whether you need a post-workout meal or a cozy weekend treat, this baked pancake bowl is remarkably simple to whip up. By combining Greek yogurt and protein powder with a touch of peanut butter, you create a cake-like texture that feels indulgent without the sugar crash.
Ingredients
Tired of Takeout? 🥡
Get 10 meals you can make faster than delivery arrives. Seriously.
One email. No spam. Unsubscribe anytime.
- Pancake Base:
- 1 large egg
- 1/2 cup (120 g) Greek yogurt (plain or vanilla)
- 1/4 cup (30 g) vanilla or chocolate protein powder
- 2 tbsp (16 g) oat flour
- 1/2 tsp baking powder
- 1 tbsp (16 g) creamy peanut butter
- 1 tbsp (15 ml) milk of choice
- 1/2 tsp vanilla extract
- Pinch of salt
- 1–2 tbsp (12–24 g) chocolate chips
- Toppings:
- 1 tbsp (16 g) creamy peanut butter, melted
- 1 tbsp (12 g) chocolate chips
- Optional: sliced banana, chopped peanuts
Instructions
- Step 1: Prep
- Preheat your oven to 350°F (175°C). Lightly grease a small oven-safe bowl or ramekin (8–12 oz capacity).
- Step 2: Mix the Batter
- In a mixing bowl, whisk together the egg, Greek yogurt, protein powder, oat flour, baking powder, 1 tbsp peanut butter, milk, vanilla, and salt until smooth and well combined.
- Step 3: Add Chocolate
- Fold in 1–2 tablespoons of chocolate chips into the batter.
- Step 4: Bake
- Pour the batter into the prepared bowl or ramekin and smooth the top. Bake for 18–22 minutes, or until the center is just set and a toothpick comes out mostly clean.
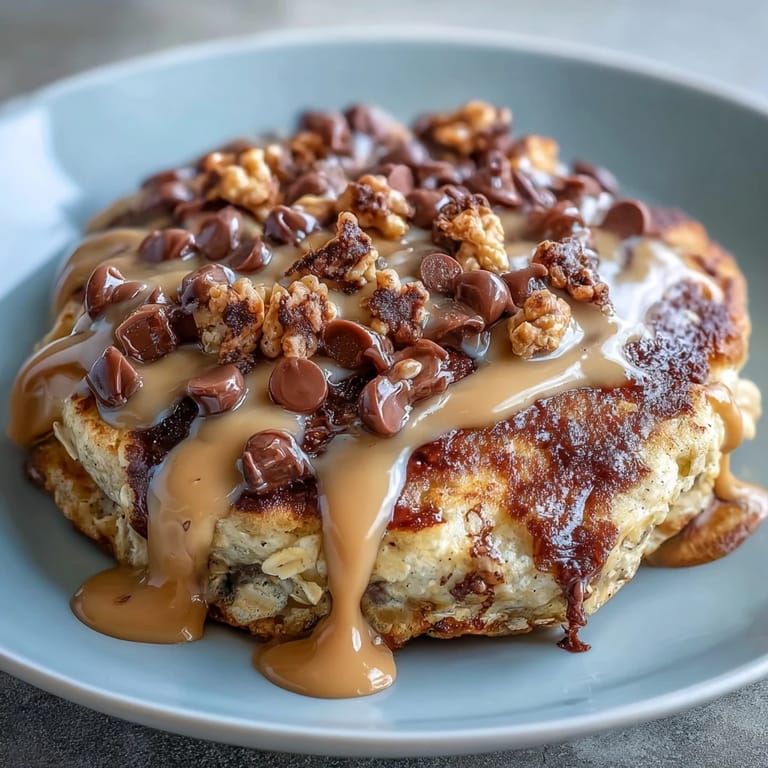
- Step 5: Finish
- Remove from the oven and let cool for 2–3 minutes. Drizzle 1 tablespoon of melted peanut butter and sprinkle additional chocolate chips over the top. Add optional toppings if desired and enjoy warm with a spoon.
Zusatztipps für die Zubereitung
To ensure the best texture, be careful not to overbake the bowl; the center should be just set to keep it moist. Using a whisk instead of a fork will help incorporate the protein powder more smoothly into the Greek yogurt base.
Varianten und Anpassungen
For a dairy-free version, use a non-dairy yogurt and a plant-based protein powder. If you have a nut allergy or preference, try almond butter or sunflower seed butter instead of peanut butter. You can also make it gluten-free by ensuring your oat flour and protein powder are certified gluten-free.
Serviervorschläge
Enhance your pancake bowl by adding fresh berries for a tart contrast, or top with sliced banana and a dusting of cocoa powder for extra decadence. For a bit of crunch, sprinkle some chopped roasted peanuts on top before serving.
 Save
Save This Peanut Butter Cup Protein Pancake Bowl is the perfect solution for those who want a nutritious, protein-packed meal without sacrificing flavor. Grab a spoon and dive into this warm, chocolatey breakfast today!
Kitchen Guide
- → Can I make this without protein powder?
Yes, substitute the protein powder with an additional 2 tablespoons of oat flour and 1 tablespoon of Greek yogurt. The texture remains similar, though protein content will be lower.
- → What size bowl works best?
An 8-12 ounce oven-safe ramekin or small bowl works perfectly. The batter should fill the container about halfway to allow room for rising while baking.
- → Can I prepare this the night before?
Mix the batter and store it covered in the refrigerator overnight. Bake fresh in the morning, though you may need to add 1-2 minutes to the baking time since the batter will be cold.
- → How do I know when it's done baking?
The edges should be lightly golden and the center set but still moist—a toothpick inserted should come out mostly clean with a few moist crumbs. Avoid overbaking for the best texture.
- → Can I use different nut butters?
Absolutely. Almond butter, cashew butter, or sunflower seed butter work well. Keep in mind that flavor profiles will shift slightly—almond butter adds a more subtle sweetness.
- → Is this freezer-friendly?
Bake and cool completely, then wrap tightly and freeze for up to 2 months. Reheat in the microwave for 1-2 minutes or at 350°F until warmed through. Add fresh toppings after reheating.