 Save
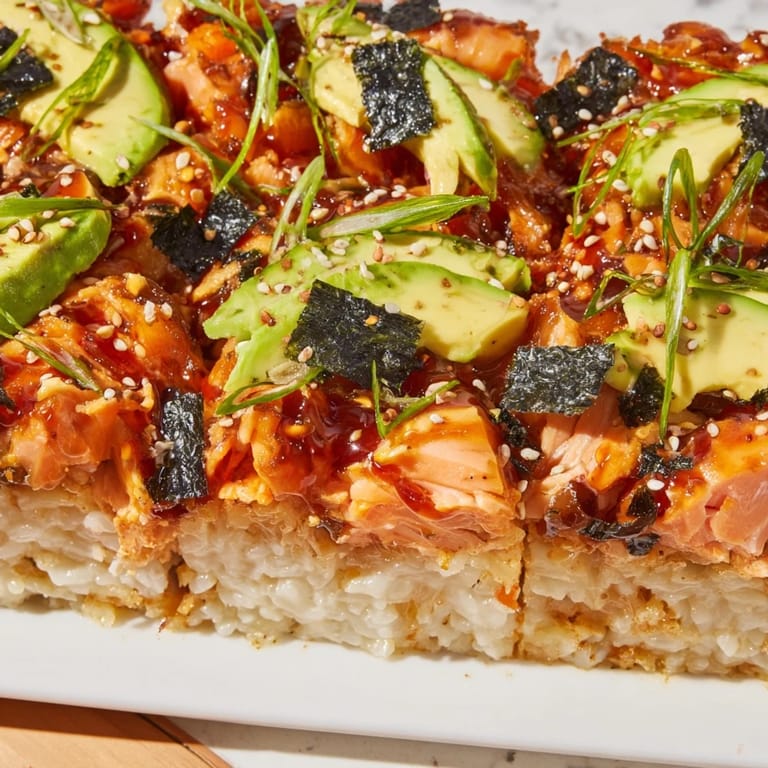
Save My first sushi bake happened on a Tuesday night when I realized I had salmon, rice, and absolutely no patience for rolling. Instead of abandoning the idea, I grabbed a baking dish and decided to layer everything like a savory lasagna. The smell of toasted nori mixed with warm cream cheese was nothing short of magic, and when my roommate walked in halfway through, the question wasn't whether it would taste good—it was whether there'd be any left for them. That night taught me that the best food isn't always about technique; sometimes it's about working with what you have.
I made this for a small dinner party last spring when a friend mentioned she'd been craving sushi but didn't know how to make it. Watching her face light up when she took the first bite—that moment when she realized homemade sushi didn't have to mean spending an hour with a bamboo mat—made the whole dish feel like a gift. She's made it three times since.
Ingredients
- Sushi rice (2 cups): This is the foundation, and rinsing it properly removes excess starch so it stays fluffy instead of turning into a gluey mess.
- Water (2 1/2 cups): The ratio matters more than you'd think—too much water and your rice becomes porridge, too little and it's crunchy.
- Rice vinegar (2 tablespoons), sugar (1 tablespoon), and salt (1 teaspoon): This trio creates that subtle tangy sweetness that makes sushi rice recognizable, so don't skip the seasoning step.
- Salmon fillet (400g): Look for a piece without dark spots or discoloration; good salmon should smell like the ocean, not fishy.
- Soy sauce and sesame oil: These two are the flavor backbone—quality matters here, and they're worth the small splurge.
- Cream cheese (100g), mayonnaise (2 tablespoons), and lemon juice: The Kewpie mayo makes this noticeably richer than regular mayo, but regular works too if that's what you have.
- Avocados (2): Choose ones that yield slightly to pressure; they should go in right after baking so they don't turn brown.
- Nori sheets (3) and sesame seeds (1 tablespoon): Toast your own sesame seeds if you can—the difference in flavor is small but real.
- Spring onions and sriracha: Both are optional, but the sriracha adds a welcome heat that cuts through the richness without overwhelming.
Tired of Takeout? 🥡
Get 10 meals you can make faster than delivery arrives. Seriously.
One email. No spam. Unsubscribe anytime.
Instructions
- Prepare the rice foundation:
- Rinse your sushi rice in a fine-mesh strainer under cold running water, stirring gently with your fingers until the water runs completely clear—this takes patience but makes the difference between fluffy and sticky rice. Combine with the measured water in a saucepan, bring to a boil, then cover and reduce heat to the lowest setting for exactly 15 minutes.
- Season the warm rice:
- While the rice steams, whisk together the rice vinegar, sugar, and salt in a small bowl until dissolved. Once the rice has rested for 10 minutes (crucial for even cooking), fold in the vinegar mixture gently with a fork, fluffing as you go—this is meditative work that helps you stay present with the dish.
- Build your rice layer:
- Spread the seasoned rice evenly into a lightly greased 9x13-inch baking dish, pressing down gently so it forms a solid base that holds everything else. If your hands stick, keep a small bowl of water nearby for dipping.
- Bake the salmon until flaky:
- While the oven preheats to 400°F, place your salmon skin-side down on a parchment-lined tray, brush with soy sauce and sesame oil, and sprinkle with black pepper. Bake for 12–15 minutes—the salmon is done when it flakes easily with a fork and the thickest part reaches 145°F on a thermometer.
- Create the creamy salmon layer:
- Combine the softened cream cheese, mayonnaise, sriracha (if using), and lemon juice in a bowl, stirring until completely smooth and no lumps remain. Gently fold in the flaked salmon, being careful not to over-mix—you want texture, not a paste.
- Assemble and warm through:
- Spread the salmon mixture evenly over the rice layer, then return the whole dish to the 400°F oven for 10 minutes until warmed and the edges are just barely golden. This second bake brings everything together and creates a subtle contrast between the warm rice and what comes next.
- Top and serve:
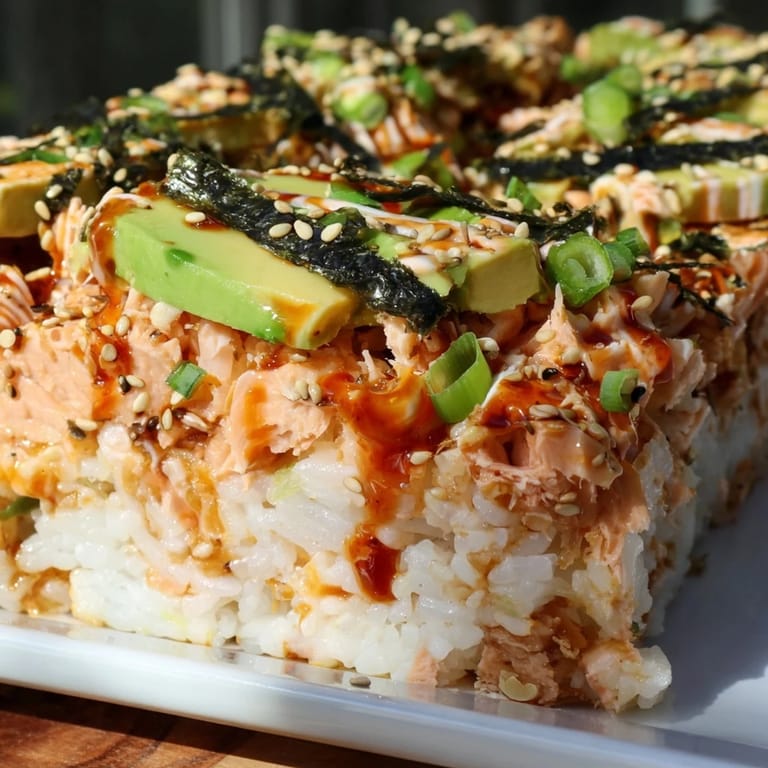
- Remove from heat and immediately top with sliced avocado, cut nori squares, sesame seeds, and spring onions—the cold avocado against the warm casserole creates a textural moment that's essential to the dish. Slice into portions and serve warm with soy sauce, pickled ginger, and wasabi on the side.
 Save
Save There's a specific moment in this recipe when you realize how clever layering is—when you bring that warm casserole out of the oven and the nori is still crispy while the rice underneath is steaming. That's when it stops being a casual weeknight dinner and becomes something you find yourself thinking about days later.
Why This Works as a Casserole
Sushi is beautiful but time-consuming, and this approach respects both the flavor and your actual schedule. By deconstructing it and layering instead of rolling, you keep every element distinct and textural while cutting the prep time by at least half. The baking dish means you're not juggling ten components at once—everything comes together in one vessel, and the gentle heat melds flavors without drying anything out the way a hot stove might.
Make It Your Own
The beauty of a casserole is that it's forgiving and adaptable to what you have on hand. Canned tuna works beautifully if salmon isn't available, and cooked shrimp or crab meat will give you entirely different flavor profiles while keeping the structure intact. Some nights I add a thin drizzle of spicy mayo before baking, and other times I keep it clean and let the salmon shine—there's no wrong call here, just different moods.
Pairing and Serving Suggestions
This dish sits in that sweet spot where it pairs equally well with a crisp Sauvignon Blanc, chilled sake, or even a light lager if that's what's in your fridge. Serve it straight from the baking dish for casual entertaining, or slice it into neat portions for something more formal—either way, have the soy sauce, pickled ginger, and wasabi nearby so people can season to their preference. The contrast of flavors means this works as a standalone main or alongside a simple miso soup and cucumber salad.
- Cut with a sharp, wet knife if you want neat slices; a dull knife will mash the layers together.
- Any leftovers taste even better cold the next day, straight from the fridge—it's like structured sushi bites without the effort.
- Make this on a day when you have time to enjoy the layering process, because that unhurried pace makes a difference in how the final dish tastes.
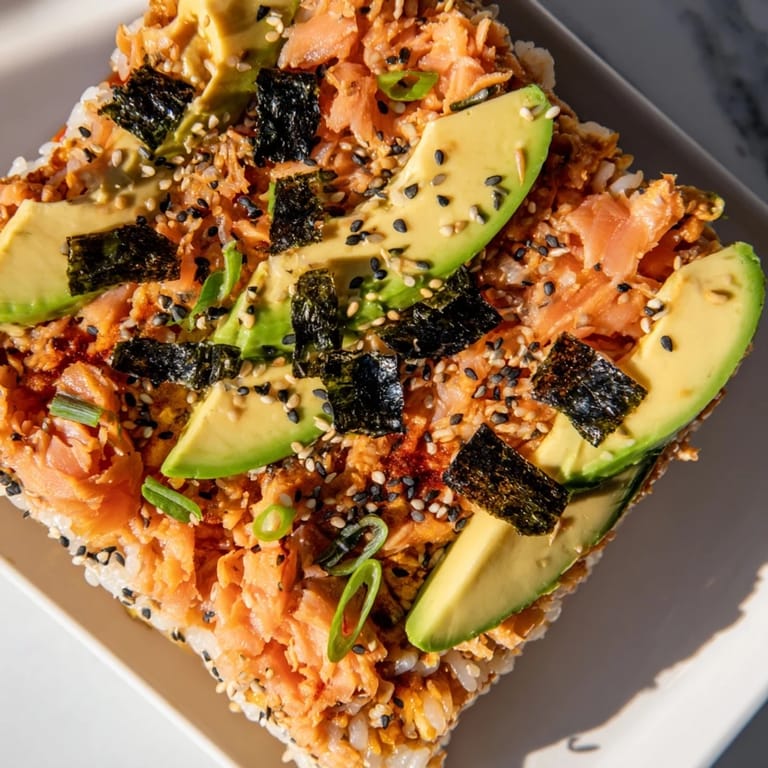
 Save
Save This recipe is proof that shortcuts and deliciousness aren't enemies—they're collaborators. Every time you make it, you'll find small moments that matter: the smell of sesame hitting warm rice, the sound of nori crisping under your teeth, the shock of cool avocado against warm layers.
Kitchen Guide
- → What type of rice is best for this dish?
Sushi rice works best due to its sticky texture, which helps the layers hold together well during baking.
- → Can I substitute the salmon with another protein?
Yes, cooked crab meat, canned tuna, or cooked shrimp can be used as alternatives while maintaining the dish's flavors.
- → How do you achieve the creamy layer consistency?
Mixing softened cream cheese with mayonnaise, sriracha, and lemon juice creates a smooth, rich texture that blends well with flaked salmon.
- → Is it necessary to bake the assembled layers?
Baking warms the layers and slightly browns the top, enhancing both texture and flavor by melding the ingredients together.
- → What are recommended accompaniments for this dish?
Serving with soy sauce for dipping, pickled ginger, and wasabi complements the savory and fresh components perfectly.