 Save
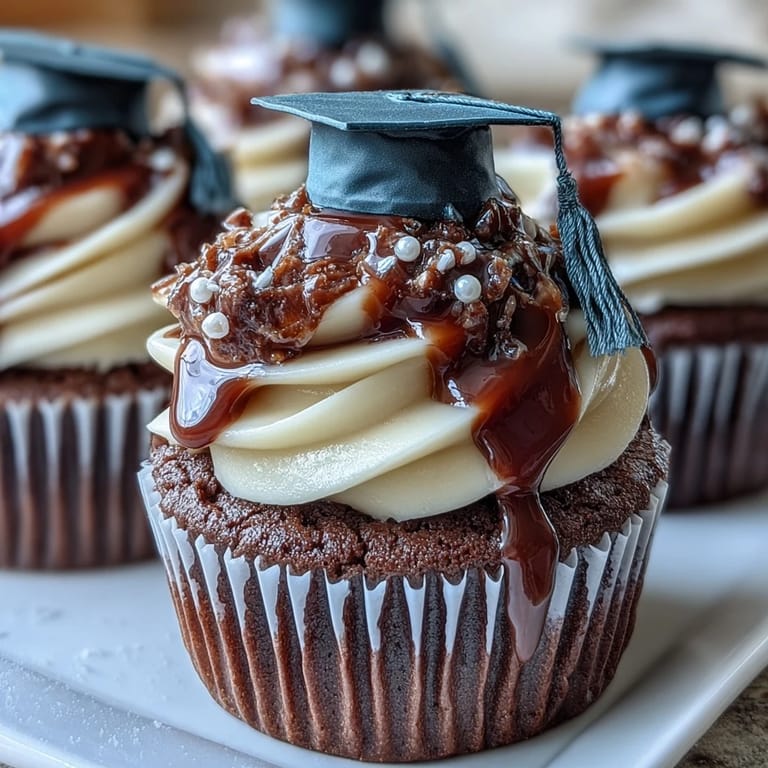
Save My cousin texted me a photo of her graduation cap mid-toss, and I realized I had exactly three days to make something special for her party. I'd never attempted edible graduation caps before, but the idea of turning a simple cupcake into a tiny celebration felt right. Standing in the kitchen that afternoon, measuring out flour and butter, I kept picturing her face when she saw these. Sometimes the best recipes come together not because you've perfected them a hundred times, but because someone you care about deserves the effort.
When I finally placed those toppers on the frosted cupcakes at my cousin's party, watching people pick them up and laugh at how perfect they were felt like watching a small magic trick succeed. One of her friends asked me to make these for her brother's graduation next month. That's when I knew this recipe had staying power, not just because it's delicious, but because it captures something people want to celebrate.
Ingredients
- All-purpose flour: The foundation of a tender crumb; I learned to spoon it into the measuring cup instead of scooping directly from the bag, which prevents over-packing and keeps cupcakes light.
- Granulated sugar and butter: Creaming these two together until fluffy creates tiny air pockets that make the cupcakes rise beautifully and stay moist.
- Eggs: Room temperature eggs blend into the batter more smoothly; leaving them on the counter for 20 minutes before baking makes a noticeable difference.
- Baking powder: This is your leavening agent, so check that your box isn't stale if cupcakes seem dense.
- Powdered sugar: Sifting it removes lumps and makes frosting silky smooth, a small step that genuinely changes the texture.
- Mini peanut butter cups: These become the crown of your graduation cap, but keep nut-free chocolate squares on hand for guests with allergies.
- Chocolate square candies: Ghirardelli or similar brand squares work perfectly as the flat base of the cap.
- Licorice or sour candy strips: These become tassels and add a playful chew; the color choices let you match school colors if you want to personalize them.
- Mini M&Ms or candy pearls: The button detail on top of the cap that makes the whole thing feel intentional and finished.
Tired of Takeout? 🥡
Get 10 meals you can make faster than delivery arrives. Seriously.
One email. No spam. Unsubscribe anytime.
Instructions
- Prep your oven and pans:
- Get your oven warming to 350°F and line your muffin tin with paper liners, making sure they sit flat and centered. This takes two minutes and prevents any cupcake mishaps later.
- Cream the butter and sugar:
- In a large bowl, beat softened butter and granulated sugar together for about two minutes until the mixture looks pale and fluffy, almost like clouds. You're aerating the batter, which is the secret to cupcakes that rise properly.
- Add eggs and vanilla:
- Drop in one egg, beat it in completely, then add the second egg and vanilla. The mixture should look smooth and slightly thickened, almost pale yellow.
- Mix the dry ingredients:
- In a separate bowl, whisk together flour, baking powder, and salt so the leavening distributes evenly throughout. This prevents dense pockets of cupcake later.
- Combine wet and dry in stages:
- Add about half the dry mixture to your butter mixture and stir until just barely combined, then pour in the milk and stir gently, then finish with the remaining dry ingredients. Stop stirring as soon as you don't see white flour streaks; over-mixing creates tough cupcakes.
- Fill the liners and bake:
- Divide batter evenly among the twelve liners, filling each about two-thirds full. Bake for 18 to 20 minutes, checking with a toothpick near the center; it should come out with a few moist crumbs but no wet batter.
- Cool the cupcakes completely:
- Let them sit in the pan for about five minutes, then transfer to a wire rack and cool completely before frosting. Warm frosting on warm cupcakes becomes a melted mess.
- Make the buttercream frosting:
- Beat softened butter until smooth and pale, about one minute. Gradually add sifted powdered sugar a little at a time while beating, then drizzle in milk and vanilla, beating until fluffy and spreadable, about three minutes total.
- Frost each cupcake:
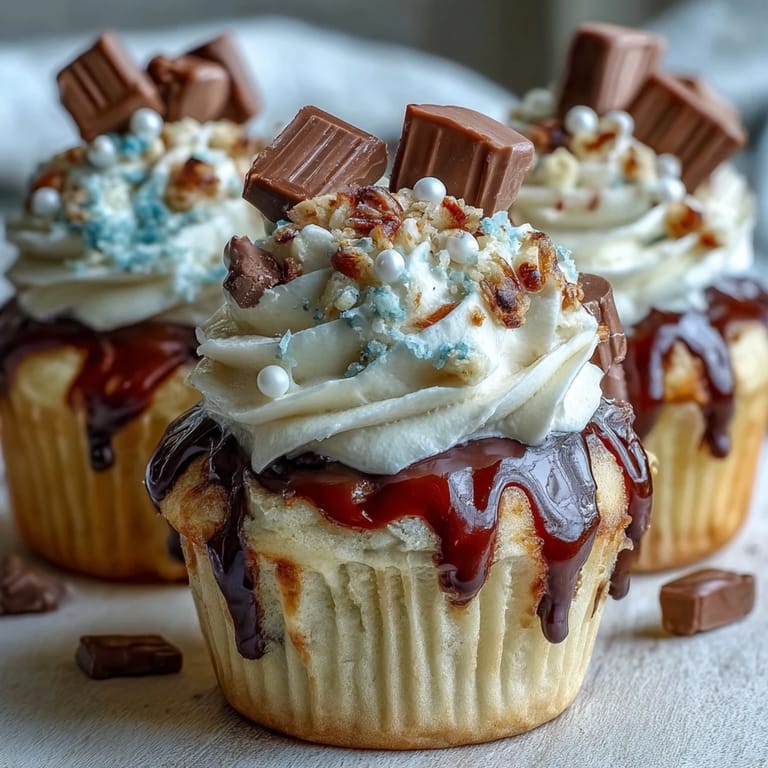
- Use a spatula or piping bag to swirl frosting onto each cooled cupcake in a generous spiral. The frosting should look inviting and have a little height to it.
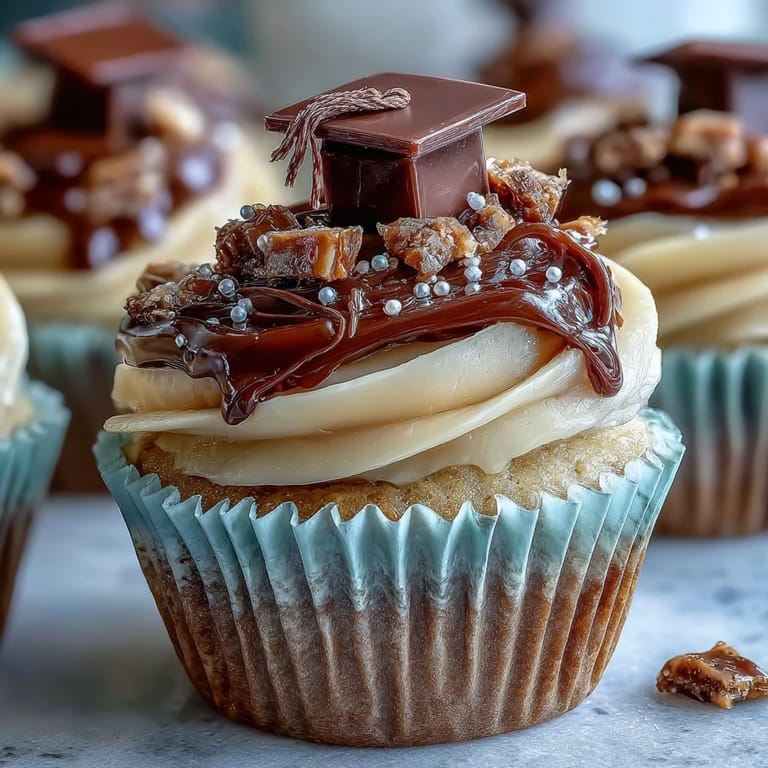
- Assemble the graduation cap toppers:
- Lay out a chocolate square flat-side up. Use a tiny dab of melted chocolate or frosting to stick a mini peanut butter cup upside-down in the center, creating the mortarboard shape. Attach a piece of licorice to one side as the tassel, then stick a mini M&M or candy pearl on top of the peanut butter cup as the button, and let everything set for a few minutes.
- Crown your cupcakes:
- Once the toppers are firm, carefully place one on top of each frosted cupcake. You're done, and they're stunning.
 Save
Save My cousin kept one cupcake in her freezer just to preserve the moment, which made me realize these weren't just treats. They became tiny edible memories of an achievement worth celebrating, with just enough playfulness to make everyone smile.
Customizing with School Colors
Food coloring mixed into the buttercream lets you match your graduate's school colors perfectly, turning these from cute to personally meaningful. I've made them in navy and gold, green and white, and even a bold maroon that looked absolutely stunning. The candies you choose for the tassel matter too; licorice comes in red, black, and green, while sour strips offer even more color options. A simple choice like this transforms a generic celebration cupcake into something that feels custom-made for one person.
Storage and Make-Ahead Tips
Baked cupcakes keep for two days in an airtight container at room temperature, which means you can bake them a day early and frost the morning of the party. The frosting itself stays smooth and spreadable in the fridge for about a week, so you could even prep that in advance. The only thing I'd add the day of the party is the cap toppers, since they're most impressive when freshly assembled and haven't softened.
When Allergies Are in the Room
Nut allergies are more common than ever, and the beauty of these cupcakes is how easily you can adapt them without losing the impact. Swap the peanut butter cups for extra chocolate squares, and choose candy tassels and toppers that are certified nut-free by double-checking labels. I've done this swap twice now and honestly couldn't taste the difference. You might also consider making a small batch of these as nut-free versions if you know guests with allergies, letting them have the full experience without worry.
- Always read candy labels carefully, as some chocolate squares and M&Ms are made in facilities that process nuts.
- Keep a list of nut-free candy brands handy for future party planning.
- Consider color-coding your toppers slightly differently if you make both nut and nut-free batches so guests know which is safe for them.
 Save
Save These cupcakes are proof that celebration doesn't need to be complicated, just thoughtful. Make them for the graduate in your life and watch their face light up.
Kitchen Guide
- → What ingredients create the cupcake base?
The cupcakes combine all-purpose flour, granulated sugar, unsalted butter, eggs, milk, baking powder, salt, and vanilla extract for a classic, moist texture.
- → How are the cap toppers assembled?
Toppings consist of chocolate squares as the cap, mini peanut butter cups inverted on top, licorice strips for tassels, and candy pearls for buttons, all secured with melted chocolate or frosting.
- → Can these cupcakes be made nut-free?
Yes, swap mini peanut butter cups with chocolate squares to avoid nuts and ensure safe enjoyment.
- → How should I store the cupcakes?
Store in an airtight container at room temperature to keep freshness for up to two days.
- → Is it possible to customize frosting colors?
Food coloring can be added to the buttercream frosting to match school or party themes.