 Save
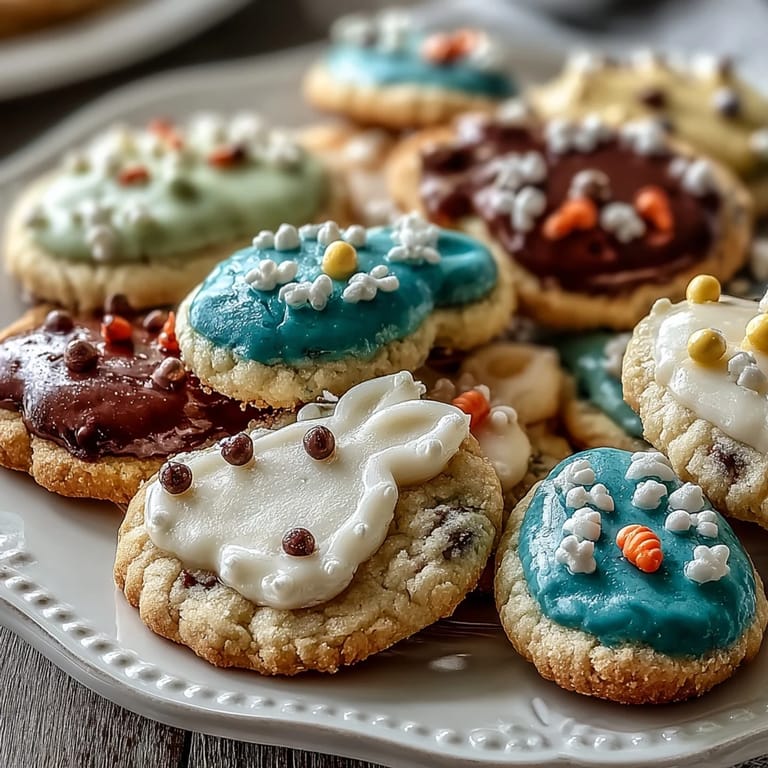
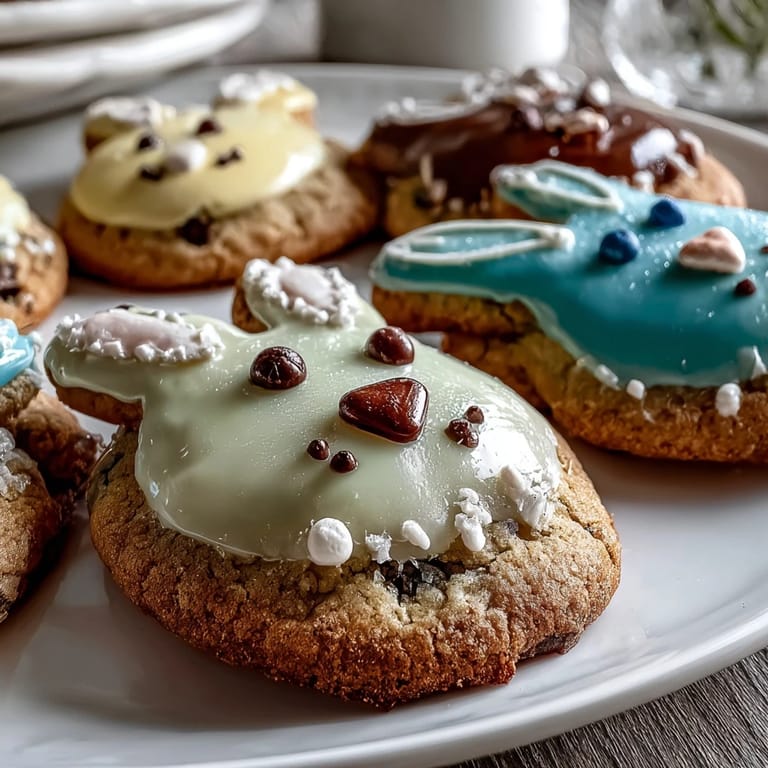
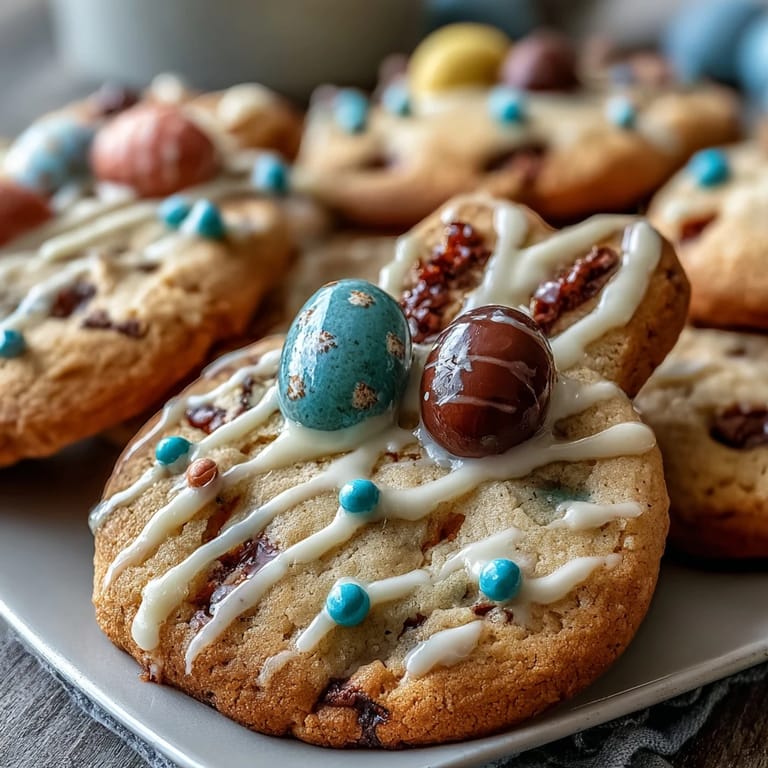
Save My sister called me three days before Easter in a panic—she'd promised her kids homemade decorated cookies and had zero time to deliver. I found myself at her kitchen table at 10 PM, flour dust everywhere, laughing at how we were basically recreating our grandmother's tradition on a whim. These butter cookies are exactly what I remembered from childhood: tender enough to bite through without crumbling, with that perfect vanilla sweetness that doesn't overwhelm. The pastel icing transforms them into something almost too pretty to eat, which never actually stops anyone at a holiday table.
Last spring, my coworkers brought their kids to our office Easter party, and I arrived with a box of these cookies decorated in pastels. The children literally stopped playing to admire them first before eating them—that moment of pure appreciation before the sugar rush hit made the whole decorating marathon worth it. Even the adults were reaching for seconds, which is when I knew I'd created something special.
Ingredients
- All-purpose flour: The foundation of tender cookies; measuring by weight rather than cups prevents the dense, tough texture that comes from packing flour.
- Baking powder: Just enough lift to make these cookies tender without making them cakey or puffy.
- Salt: A pinch that makes the vanilla sing and balances the sweetness beautifully.
- Unsalted butter: Room temperature is non-negotiable here; cold butter won't cream properly and you'll lose that light, airy texture.
- Granulated sugar: The sweet base that creams with butter to trap tiny air bubbles, creating that signature tender crumb.
- Large egg: Adds moisture and helps bind the dough together without making it tough.
- Pure vanilla extract: Two teaspoons might seem like a lot, but it's what makes these cookies taste like a memory.
- Milk: The secret weapon for preventing dry dough; it adds just enough moisture to bring everything together gracefully.
- Powdered sugar: Sifted is key because lumps will ruin your smooth icing finish.
- Meringue powder: This stabilizes the royal icing so it hardens properly; it's what separates pretty icing from icing that stays sticky forever.
- Warm water: Added gradually because you can always add more, but you can't take it back once the icing is too thin.
- Gel food coloring in pastel shades: Gel colors don't water down your icing like liquid colors do, and pastels are forgiving and elegant.
Tired of Takeout? 🥡
Get 10 meals you can make faster than delivery arrives. Seriously.
One email. No spam. Unsubscribe anytime.
Instructions
- Combine your dry ingredients:
- Whisk together the flour, baking powder, and salt in a medium bowl and set it aside. This step prevents lumps from hiding in the final dough and ensures even distribution of the leavening agent.
- Cream butter and sugar until it transforms:
- Beat them together for 2 to 3 minutes until the mixture looks pale and fluffy, almost like a cloud. This is where the magic happens—you're trapping air that will make your cookies tender rather than dense.
- Add egg and vanilla:
- Mix until everything is well combined, scraping down the bowl to catch any butter hiding on the sides. This step is quick but crucial for even distribution.
- Gently fold in the dry ingredients:
- Add them gradually on low speed, then pour in the milk and mix just until the dough comes together. Overmixing at this stage will develop gluten and make your cookies tough, which is the opposite of what we want.
- Chill the dough:
- Divide it into two discs, wrap them in plastic, and refrigerate for at least an hour, or even overnight. Cold dough rolls out cleanly and holds its shape during baking instead of spreading into blobs.
- Preheat and prepare:
- Get your oven to 350°F and line baking sheets with parchment paper. This prevents sticking and gives you an even bake on the bottom.
- Roll and cut with precision:
- On a lightly floured surface, roll the dough to about 1/4-inch thickness—you want cookies that are sturdy enough to decorate but still tender to bite. Use your Easter-shaped cutters and arrange cookies about an inch apart on the sheets.
- Bake with patience:
- Watch them closely; they should bake for 8 to 10 minutes until the edges are just starting to turn golden. The centers might still look slightly underdone, which is perfect because they'll continue cooking slightly as they cool.
- Cool properly:
- Leave them on the baking sheet for 5 minutes to firm up, then transfer to wire racks for complete cooling. This prevents the bottoms from being too soft while the tops harden unevenly.
- Make your royal icing base:
- Combine sifted powdered sugar and meringue powder in a large bowl, then add water gradually while mixing on low. Once it's smooth, beat it on high for 3 to 4 minutes until stiff peaks form—this creates the perfect consistency for piping.
- Color your icing:
- Divide the icing into bowls and add gel food coloring to each one, one tiny drop at a time. Gel colors are concentrated, so you need very little to achieve beautiful pastel shades.
- Decorate with joy:
- Transfer icing to piping bags and let your creativity flow. You can pipe outlines, fill in designs, add details—there's no wrong way to do this.
- Let everything set:
- Allow the icing to dry completely before stacking or storing the cookies. This usually takes a few hours but ensures your beautiful work stays perfect.
 Save
Save There's something about sitting at the kitchen table with decorated Easter cookies arranged on a pretty plate, steam rising from a cup of Earl Grey tea beside them, that feels like we've created a small moment of peace in a busy season. These cookies taste like springtime and celebration, and they remind us that the best treats are the ones we make with care and share with people we love.
Flavor Variations Worth Trying
The basic dough is a blank canvas that welcomes experimentation without complaint. I've added half a teaspoon of almond extract alongside the vanilla for a subtle nuttiness, and it transforms the cookies into something almost sophisticated, like something a French grandmother would make. Lemon zest mixed into the dough gives them a bright, subtle citrus note that pairs beautifully with the pastel aesthetic and makes them feel summery even though you're making them for spring.
Decorating Techniques That Look Professional
The key to looking like you actually know what you're doing is committing to one technique per cookie rather than trying to do everything at once. A simple outline piped around the edge with filled-in color inside is elegant and forgiving, while dots and stripes add visual interest without requiring perfect precision. My sister discovered that thinning the icing slightly with a few drops of water and flooding the cookie creates this gorgeous smooth surface that looks almost glazed, and suddenly your kitchen creations look bakery-quality.
Storage and Make-Ahead Magic
These cookies are genuinely one of the best make-ahead desserts because they actually taste fresher on day two or three, once all the flavors have had time to develop and mellow. Store them in an airtight container at room temperature, and they'll stay soft and perfect for up to a week—which means you can bake the cookies days ahead and decorate them just before your celebration if timing feels tight. That flexibility is honestly why I make these for every spring gathering; no last-minute stress, just beautiful cookies ready to shine.
- Frozen dough keeps in the freezer for up to three months, so you can bake fresh cookies whenever the mood strikes.
- If cookies somehow get hard (which rarely happens with proper storage), a slice of bread in the container overnight will soften them back up.
- Royal icing can be made ahead and stored in an airtight container for several days, which saves you time on decorating day.
 Save
Save Making these cookies has become our family's quiet Easter ritual, the kind of thing nobody explicitly plans but everyone somehow expects. There's real magic in butter, sugar, and a little bit of time.
Kitchen Guide
- → How do I achieve soft and tender sugar cookies?
Ensure not to over-bake the cookies and keep the dough chilled before baking. Using softened butter and the right flour ratio also helps retain tenderness.
- → What is the purpose of chilling the dough?
Chilling firms the dough, making it easier to roll out and cut shapes cleanly without sticking or spreading during baking.
- → How can I get stiff peaks for the royal icing?
Beat the icing mixture on low to combine, then on high for 3–4 minutes until stiff peaks form, ensuring the icing holds shape for decorating.
- → Can I customize the icing colors?
Yes, gel food coloring allows you to tint the royal icing in various pastel shades, perfect for spring-themed decorations.
- → What are some storage tips for these cookies?
Store decorated cookies in an airtight container at room temperature for up to one week to maintain freshness and icing texture.