 Save
Save My coworker Sarah once brought these to a team lunch, and I watched everyone's faces light up the moment they unwrapped the nori—there's something about a perfectly formed triangle of rice that just feels like care in edible form. She'd learned to make them during a semester abroad in Tokyo, and when she finally taught me her method, I realized the magic wasn't in fancy technique but in understanding how the rice needs to cool, how the filling should peek through just right, and why damp hands make all the difference. Now I make them constantly, sometimes for road trips, sometimes just because I want something that tastes fresh and intentional.
I remember bringing these to a picnic last summer and realizing halfway through that they'd somehow become the thing people reached for first, even before the fancy sandwiches someone else had spent hours on. There's a confidence that comes with knowing you've made something portable and delicious, something that holds together in your hands and tastes better with every bite.
Ingredients
- Japanese short-grain rice (2 cups): This is the backbone of everything—short-grain rice has the right starch content to stick together without being mushy, which is exactly what you need for shaping.
- Water (2 1/4 cups): The ratio matters more than you'd think; too much and your rice gets soggy, too little and it's crunchy.
- Rice vinegar (1 tablespoon): This gives the rice that subtle tang that makes you taste something bright even though you can't quite name it.
- Sugar and salt (1 teaspoon and 1/2 teaspoon): Together they balance the vinegar and bring out the rice's natural sweetness.
- Canned or sushi-grade tuna (5 oz / 140 g): Canned is convenient and reliable; sushi-grade raw tuna is more authentic but requires confidence in your fishmonger.
- Kewpie mayonnaise (2 tablespoons): Japanese mayo has a richer, almost buttery quality that makes the filling creamy without being heavy—regular mayo works but tastes different.
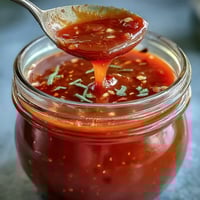
- Sriracha (1 teaspoon): Start with less and add more; heat builds as it sits, and everyone's tolerance is different.
- Soy sauce and sesame oil (1 teaspoon each): These create the umami backbone that makes your mouth think this is restaurant-quality tuna.
- Green onion (1 chopped): The fresh bite cuts through the richness and adds a subtle sharpness that wakes up the whole filling.
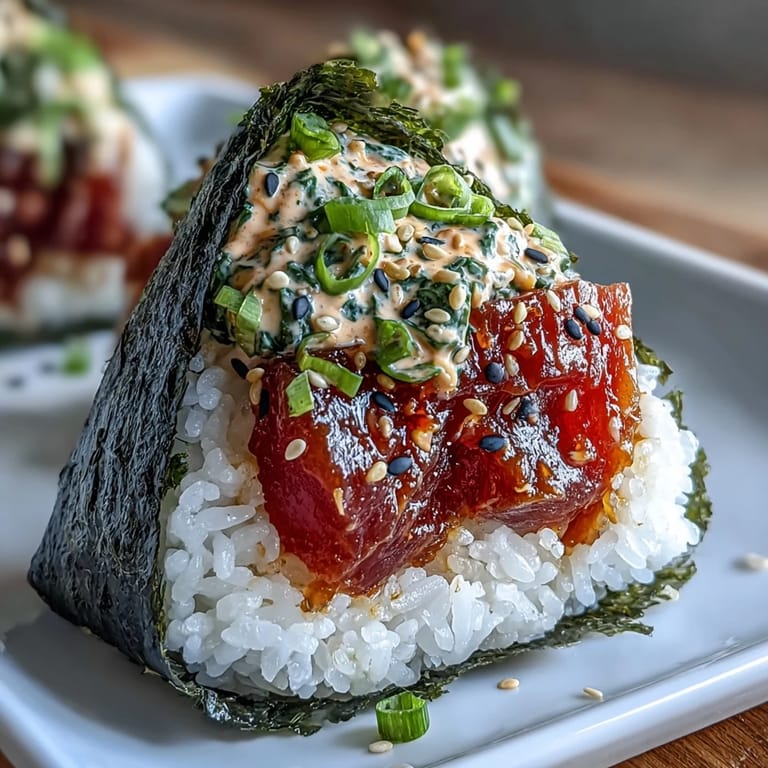
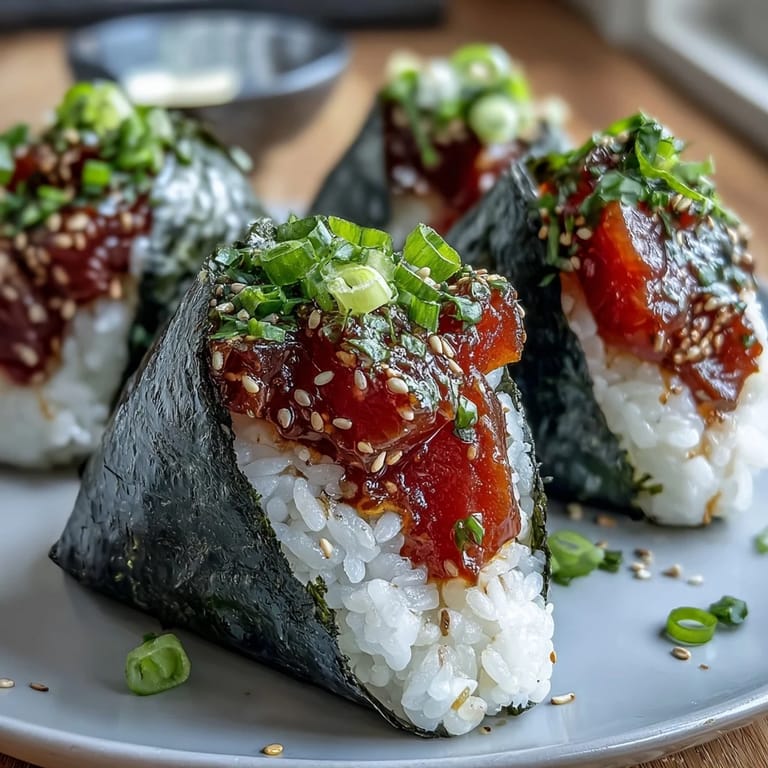
- Nori sheets (3 halved): Buy the good stuff if you can—cheaper seaweed tastes papery and ruins the whole experience.
- Toasted sesame seeds (optional): These add a nutty crunch that transforms a good onigiri into something you'll think about later.
Tired of Takeout? 🥡
Get 10 meals you can make faster than delivery arrives. Seriously.
One email. No spam. Unsubscribe anytime.
Instructions
- Rinse and cook your rice:
- Cold water and your hands work better than anything else for rinsing—you're looking for water that runs clear, which usually takes three or four rounds. Once it's cooked and has rested those ten minutes, it'll have the right texture to work with, neither too hot nor too cool.
- Season the warm rice:
- Fold gently so you're coating each grain without squashing it into paste; this is where patience actually changes the texture. The rice should smell faintly of vinegar and taste subtly sweet, nothing aggressive.
- Mix your spicy tuna filling:
- Combine everything in one bowl and taste as you go—if it's not spicy enough now, you're probably going to want more Sriracha. The mixture should smell fragrant and slightly fishy, with mayo visible throughout.
- Prepare for shaping:
- Wet hands prevent sticking better than any other trick, and that light salt gives you grip without making things taste oversalted. Think of your palm as a mold, not a weapon—gentle pressure does the job.
- Shape the onigiri:
- Flatten rice in your palm, add filling to the center, fold carefully, and press until it holds but doesn't feel rock-hard. A triangle is traditional but honestly, any neat shape works if it feels solid enough to not fall apart when you pick it up.
- Wrap with nori:
- A strip around the base looks polished and gives you something to grab without touching rice. The nori will soften slightly from the rice's moisture, which is exactly what you want.
- Finish and store:
- Sesame seeds add texture if you're serving right away; they get soft if they sit too long. Plastic wrap keeps them fresh for hours if you need to pack them for later.
 Save
Save There's a moment when you hold a freshly shaped onigiri in your hand and it's still warm, the nori still crisp, and you realize you've made something that's both simple and somehow perfect. That's the moment I understood why onigiri matter in Japanese cuisine—they're not complicated, but they're made with intention.
Why Temperature and Timing Matter
Hot rice burns your hands and makes the filling ingredients wilt; cold rice doesn't hold together the way warm rice does, but there's a sweet spot right around room temperature where everything cooperates. The first time I shaped these when the rice was still steaming, I wasted half a batch and learned that patience at this stage saves frustration later.
Choosing Your Tuna
Canned tuna in water is reliable and convenient—just make sure you drain it well or your filling becomes watery. If you want to use raw, sushi-grade tuna, dice it finely and know that this version tastes lighter, more delicate, and slightly more special, though it demands a bit more confidence in your ingredients.
Storage and Serving Suggestions
These are best served fresh, but they keep wrapped in plastic for several hours without getting soggy, which makes them perfect for lunches that need to travel. A little miso soup or a cucumber salad on the side elevates the whole meal into something that feels thoughtfully put together.
- Wrap them individually in plastic wrap if you're packing them for lunch the next day.
- Let them sit at room temperature for a few minutes before eating if they've been in the fridge—cold rice tastes heavier.
- If the nori gets soft, that's actually fine; it means the rice is at the right moisture level.
 Save
Save Make these once and you'll understand why they've been lunch in Japan for centuries—they're proof that the best food doesn't have to be complicated. Once you've shaped a few, it becomes second nature, and then you're free to just enjoy making something good.
Kitchen Guide
- → What type of rice is best for onigiri?
Japanese short-grain rice works best due to its sticky texture, which helps the rice hold shape when molded.
- → Can I substitute the spicy tuna filling with cooked tuna?
Yes, canned tuna can be used as long as it is well drained and mixed with the seasonings to ensure flavorful filling.
- → How do I prevent the rice from sticking to my hands when shaping onigiri?
Wet your hands with water and lightly sprinkle with salt before shaping to keep rice from sticking and add subtle seasoning.
- → What is the purpose of wrapping onigiri with nori?
Nori adds a savory, slightly crisp contrast and helps keep the rice balls intact while providing additional umami flavor.
- → Can I adjust the spiciness of the tuna filling?
Yes, simply reduce or omit the Sriracha or hot sauce to control the heat level according to preference.