 Save
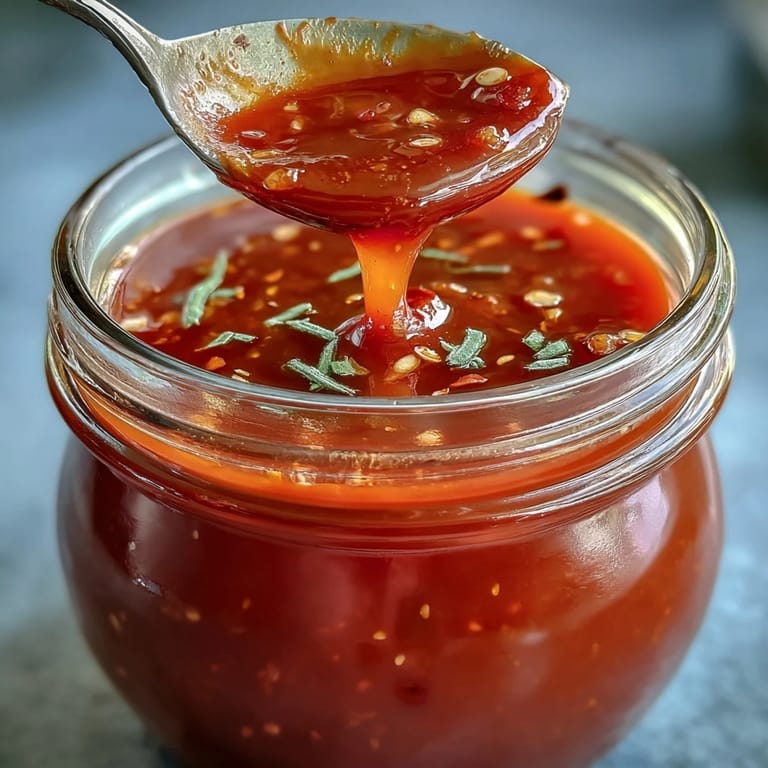
Save The first time I tried my hand at homemade fermented hot sauce, it was an impulsive decision after I noticed a jumble of chili peppers threatening to wilt in the fridge. The kitchen filled with a fragrant swirl of raw pepper heat and garlic that tickled my nose and made me grin. My hands tingled for hours—even beneath gloves—reminding me just how potent this little project would be. It’s funny, there’s anticipation in watching a mason jar bubble away on the counter for a week, each day bringing a subtle tang and fizz. No store-bought bottle has ever given me the same giddy satisfaction as prying open that jar after seven days of fermenting.
Last autumn, I brought out a just-finished jar during board game night, and my friends kept laughing (and gasping) between spicy mouthfuls and shouts of victory. I realized watching them that spice has a way of stealing the show—warming not just bellies, but the whole mood around a table. There’s a quiet triumph in swapping secret recipes and being the friend who brings something homemade. The best part is seeing someone light up after trying something you made from scratch. Now, when I spot bubbling jars on my counter, I think of all the conversations they’ll fire up later.
Ingredients
- Fresh chili peppers (300g): The star—choose your favorites; mix mild and hot varieties for balanced flavor and color.
- Red bell pepper (1 small): Sweetness here rounds out the heat, and I’ve found that roasting it first gives a smoky edge if you’re feeling adventurous.
- Garlic cloves (4): Don’t skimp—garlic mellows beautifully as it ferments, imparting a savory depth.
- Shallot or onion (1 small or 1/2 small): Adds an aromatic note; a little goes a long way, so don’t overload it.
- Carrot (1 medium, optional): If you like a thicker, slightly sweet sauce, carrot is your secret weapon; slice thinly for even fermentation.
- Filtered water (500ml): Chlorine can mess with fermentation, so use filtered or boiled and cooled water if you can.
- Non-iodized salt (15g): Go for pure sea salt or kosher—never table salt with additives—and measure by weight for best results.
- Apple cider vinegar or distilled white vinegar (2 tbsp): Added at the end; it brightens the finished sauce and extends shelf life.
Tired of Takeout? 🥡
Get 10 meals you can make faster than delivery arrives. Seriously.
One email. No spam. Unsubscribe anytime.
Instructions
- Make a simple brine:
- Toss the salt and filtered water in a bowl and stir until the salt dissolves completely—a little patience and extra stirring here goes a long way for even fermentation.
- Chop the produce:
- Roughly chop your chili peppers, bell pepper, carrot (if using), garlic, and shallot or onion; don’t worry about precision, the blender will smooth things out later.
- Pack it all in:
- Layer the chopped vegetables into your scrupulously clean glass jar, packing them in gently to keep them from floating when the brine goes in.
- Add the brine and weigh down:
- Pour the brine carefully to cover the vegetables, then use a fermentation weight or zip-top bag filled with brine to sink them—no bits should poke above the surface.
- Let it breathe:
- Cover the jar with a loose-fitting lid or an airlock to allow escaping gases from the fermentation without letting dust in—those first fizzy bubbles are always a thrill.
- Ferment patiently:
- Place the jar in a cool, dark spot for a full seven days, checking daily to ensure everything stays submerged and swiping away any stray mold or scum on top.
- Blend to finish:
- After a week, pour the entire contents into a blender, add your vinegar, and blend until smooth; add extra brine or vinegar if you fancy a thinner pour.
- Strain or don’t strain:
- For a silky sauce, press the purée through a sieve—otherwise, leave it a touch rustic, which I secretly prefer on pizza.
- Bottle and store:
- Funnel your sauce into a sterilized bottle or jar, then refrigerate; the flavor keeps evolving with time, and it will stay punchy for months.
 Save
Save I’ll never forget slipping an extra spoonful of this sauce onto my partner’s breakfast eggs—the look of delighted betrayal when the heat kicked in was priceless. It sparked a playful rivalry in the kitchen to see who could handle a spicier bite, and it’s been a beloved household dare ever since.
Troubleshooting: When Fermentation Gets Funky
Every jar will develop its own unique personality, but sometimes, an off smell or unwanted surface growth appears. It’s normal for things to get cloudy, or for white harmless yeast (kahm) to form—you can just skim it away. If you spot blue, black, or pink mold, start over and chalk it up to experience. Once, a whole batch fizzed over the counter because I tightened the lid too much, so don’t forget to let gas escape. A little funk is fine, but trust your senses; if something doesn’t look or smell right, better safe than sorry.
How to Use This Sauce Beyond Tacos
This hot sauce brightens more than just Mexican fare—I splash it into soups, whisk it into vinaigrettes, and even liven up popcorn with a few spicy shakes. Stir a little into ketchup for a fiery dip or spoon over roasted veggies for a weeknight upgrade. I once mixed some into vegan mayo and called it ‘fermentaise’—untraditionally perfect on sandwiches. Keep the bottle in arm’s reach, and you’ll start finding excuses to drizzle it over everything. There’s no wrong way, only new favorites waiting to be discovered.
Fermentation Tips: Small Lessons From Big Batches
Keeping a fermentation diary is oddly helpful—I note temperatures, pepper types, and a quick daily sniff, which saved me from a near-mishap last summer. Every kitchen has its quirks: some corners are warmer, some jars bubble faster, so keep an eye on your batch. Taste your ferment at day five and day seven to learn your own tangy ‘sweet spot.’ Little victories, like mastering the right level of brine, make each batch feel like an accomplishment.
- Wear gloves to chop hot chilies; the burn can linger hours later.
- If you’re nervous about fermenting, start with milder peppers before leveling up the heat.
- Wash all utensils and jars thoroughly to avoid unwanted microbes.
 Save
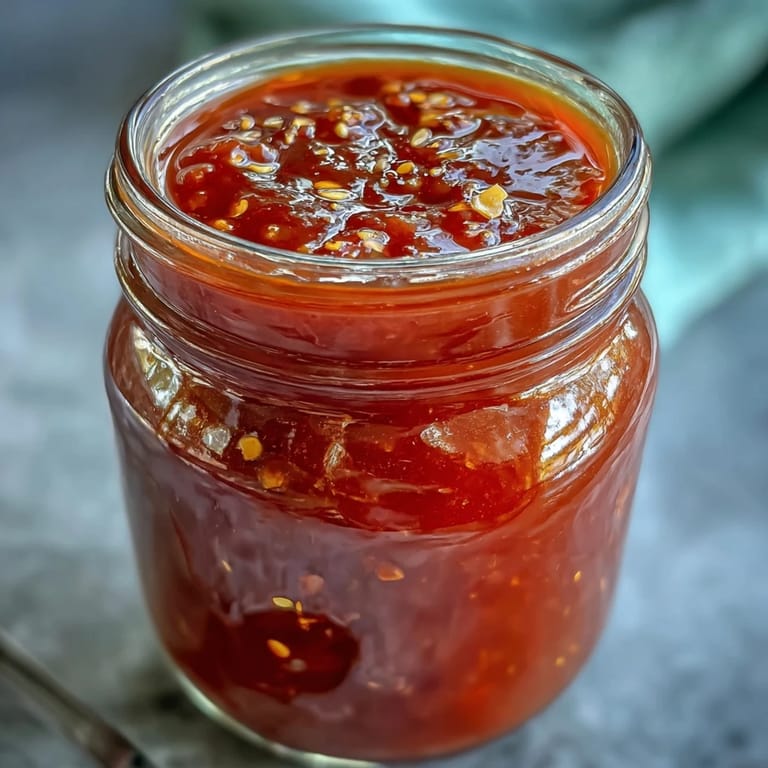
Save Homemade fermented hot sauce invites a little chaos into the kitchen, but delivers big rewards for the patient cook. Pour yourself a taste every so often—you’ll notice it changes, just as you do, from batch to batch.
Kitchen Guide
- → How long should I ferment the chilies?
Ferment at 18–22°C (65–72°F) for seven days for balanced tang and heat. Taste can vary by pepper ripeness; extend fermentation a few days for a stronger lactic tang.
- → How do I keep the vegetables submerged?
Use a fermentation weight or a small zip-top bag filled with brine to press the vegetables below the liquid. Ensuring they stay submerged prevents mold and encourages even fermentation.
- → Can I skip the vinegar?
Vinegar brightens and stabilizes the blended sauce. You can omit it, relying solely on the fermented brine for tang, but add extra brine and refrigerate promptly if you do.
- → How can I control the heat level?
Adjust pepper selection and ratios: milder chiles like Fresno or jalapeño yield moderate heat; include habanero or Thai chiles for more kick. Removing seeds and membranes reduces intensity.
- → Should I strain the sauce?
Straining through a fine-mesh sieve produces a smooth pourable sauce. Leaving it unstrained keeps more texture and body; both approaches work depending on desired mouthfeel.
- → How long does the finished sauce keep?
Refrigerated in a sterilized bottle or jar, the sauce keeps up to three months. Flavor will continue to evolve; always check aroma and appearance before use.