 Save
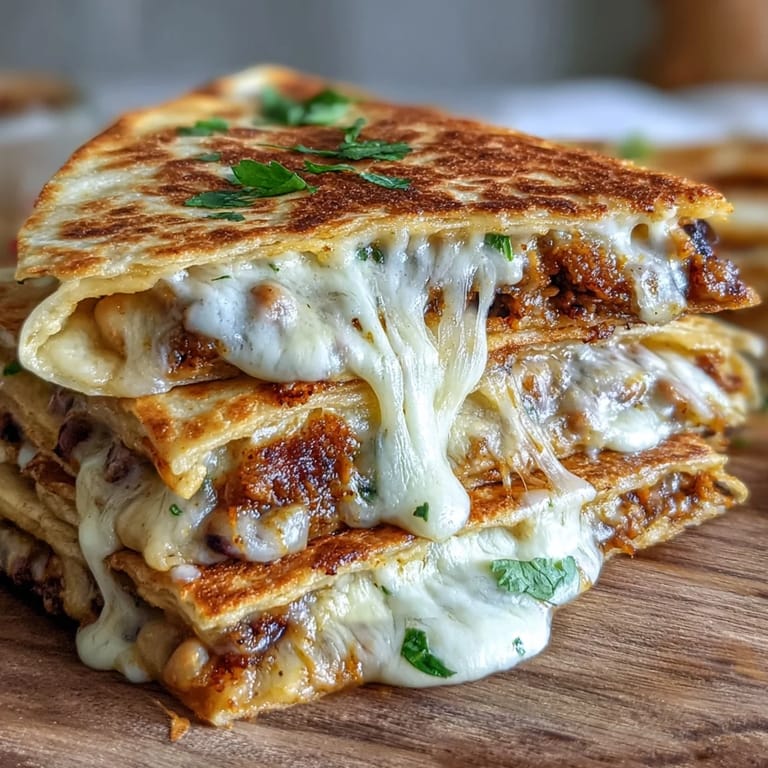
Save My neighbor Marcus handed me a container of black-eyed peas one Sunday afternoon, insisting I do something interesting with them instead of the usual rice-and-greens situation. I stood there in my kitchen, staring at those little pale beans with their distinctive dark spot, and suddenly thought: why not wrap them in something warm and crispy? That first quesadilla came together almost by accident, but the moment I bit into that golden, cheese-melted exterior and hit the creamy, cumin-spiced filling inside, I understood why he'd been so confident.
I made these for my book club once, thinking they'd be a casual appetizer, and people literally asked for seconds before finishing their first one. Someone said the lime and cilantro combination tasted like a warm hug wrapped in a tortilla, which honestly stuck with me because it's exactly what they are.
Ingredients
- Black-eyed peas (1 1/2 cups cooked): Canned works beautifully if you rinse them well, though I've started cooking dried ones from scratch because the flavor feels fuller and less tinny.
- Olive oil (1 tablespoon): Use something you actually like the taste of since it's building the base flavor for your filling.
- Onion (1/2 small, finely diced): The smaller dice means it softens faster and distributes more evenly through the mash.
- Garlic (1 clove, minced): Fresh is non-negotiable here; it wakes up everything else in the filling with its sharp, bright bite.
- Ground cumin (1/2 teaspoon): This is the secret that makes people ask what you did differently; don't skip it or substitute.
- Smoked paprika (1/4 teaspoon): It adds a whisper of smokiness that tastes like you spent way more time on this than you actually did.
- Salt and pepper: Taste as you go because the peas' saltiness varies depending on the brand.
- Fresh lime juice (1 tablespoon): Bottled works in a pinch, but fresh lime juice brightens the whole filling in a way that feels alive.
- Fresh cilantro (1/4 cup, chopped, optional): If you're the type of person cilantro tastes like soap to, skip it without guilt and maybe add a pinch of fresh parsley instead.
- Flour tortillas (8 medium, 8-inch): Room temperature ones fold easier than cold ones straight from the fridge.
- Shredded cheddar or Monterey Jack cheese (1 1/2 cups): Monterey Jack melts slightly softer and more evenly, though cheddar gives you a richer, sharper flavor.
- Butter or neutral oil (2 tablespoons for frying): Butter creates that golden, slightly nutty crust that oil alone can't quite match.
Tired of Takeout? 🥡
Get 10 meals you can make faster than delivery arrives. Seriously.
One email. No spam. Unsubscribe anytime.
Instructions
- Warm your oil and soften the aromatics:
- Pour that tablespoon of olive oil into a skillet over medium heat and let it shimmer for about 30 seconds. Add your diced onion and listen for that gentle sizzle; it's the sound of flavor building. Sauté for 3 to 4 minutes, stirring occasionally, until the onion turns translucent and smells sweet instead of sharp.
- Bloom the garlic:
- Add your minced garlic and stir constantly for exactly 1 minute so it releases its fragrance without burning. You'll know it's right when your whole kitchen smells like garlic dreams.
- Build the spice and warmth:
- Dump in your black-eyed peas along with the cumin, smoked paprika, salt, and pepper. Stir everything together and let it cook for 2 to 3 minutes until the spices coat the peas and the whole mixture is heated through; the peas should be steaming gently.
- Mash with intention:
- Remove from heat and grab a potato masher or fork. Press and fold the mixture, leaving some whole peas for texture rather than making it completely smooth; you want it creamy but still a little chunky. Stir in your lime juice and cilantro if you're using it, tasting as you go.
- Assemble your quesadillas:
- Lay out 4 tortillas on your work surface. Divide the warm filling evenly, spreading it over just one half of each tortilla, leaving the other half clear. Sprinkle your cheese generously over the filling, then fold the tortilla in half like you're closing a book.
- Pan-fry to golden perfection:
- Heat 1/2 tablespoon of butter or oil in your skillet over medium heat until it shimmers. Place one or two quesadillas in the pan (don't overcrowd) and listen for that immediate sizzle as they hit the heat. Cook for 2 to 3 minutes on the first side until deep golden brown, then flip carefully and cook the other side another 2 to 3 minutes until the cheese is visibly melted inside and the exterior is equally golden.
- Finish and serve:
- Transfer your quesadillas to a cutting board. Let them rest for about 1 minute so the cheese sets slightly, then slice each one into 3 or 4 wedges. Serve immediately while everything is still hot and crispy.
 Save
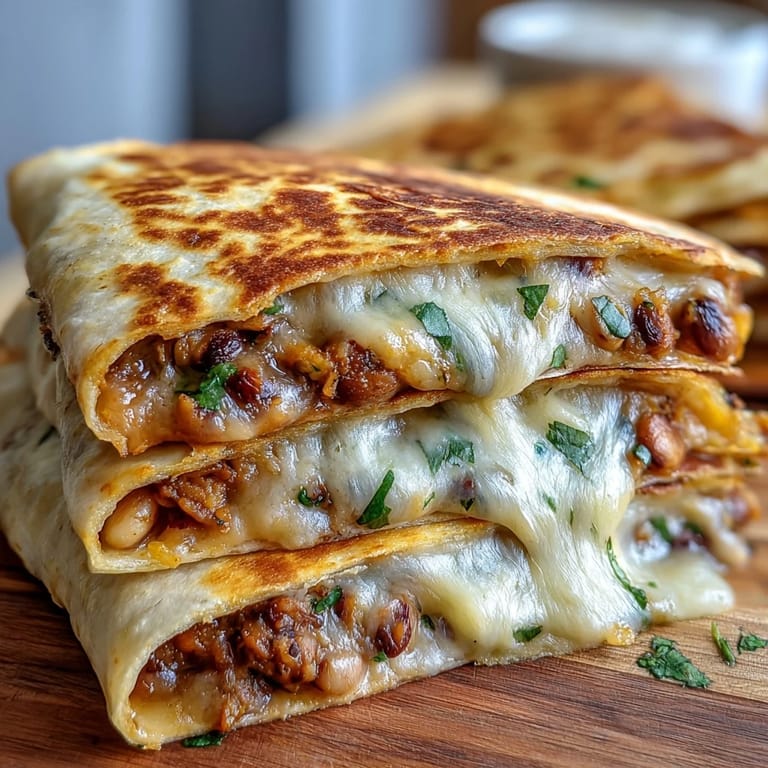
Save There's a moment every single time I make these where the smell hits you, that combination of cumin and lime and melting cheese, and suddenly you remember why comfort food exists. It's not about being fancy; it's about how a simple combination of things can make you feel taken care of.
Variations Worth Trying
Once you've made this base version a few times, the variations will start calling to you naturally. Sautéed jalapeños add a heat that builds slowly across your palate, while roasted red peppers bring sweetness and a slightly smoky undertone that plays beautifully with the cumin. I've added crumbled cotija cheese on top of the melted cheddar for a salty, almost briny note that feels more sophisticated.
Swapping Out for Dietary Needs
Corn tortillas give you a grainier texture and a different flavor profile that some people actually prefer, though they're slightly more fragile when you flip them. For dairy-free versions, vegan cheddar has come so far that most people genuinely can't tell the difference anymore, especially once it melts into everything else. Whole wheat tortillas add a nuttiness that pairs unexpectedly well with the peas and spices, creating a more complex bite.
Making This Meal Feel Complete
These quesadillas don't need much accompaniment, but a dollop of sour cream, a spoonful of salsa, or some fresh guacamole transforms them into something approaching a full meal. I've served them with a simple lime-dressed green salad on the side, and that brightness and crunch gave everything a lighter feel. There's something about the contrast of temperatures and textures that makes the whole experience feel intentional rather than thrown together.
- Keep your sour cream and salsa at room temperature so they don't cool down your hot quesadilla the moment they touch.
- A squeeze of fresh lime juice over the top right before eating brightens everything and ties the flavors back together.
- Make extra filling and keep it in the fridge for the next few days because it's honestly delicious on toast, in rice bowls, or straight from the container while you're standing in front of the fridge.
 Save
Save These quesadillas prove that the most satisfying meals don't have to be complicated or take hours of your time. Make a batch this week and taste how simple, intentional cooking becomes something people remember.
Kitchen Guide
- → Can I use dried black-eyed peas instead of canned?
Yes, soak and cook dried black-eyed peas according to package directions until tender, then drain well before using. You'll need about 1/2 cup dried peas to yield 1 1/2 cups cooked.
- → What cheese works best in these quesadillas?
Cheddar and Monterey Jack are excellent choices for their melting qualities. Pepper jack adds a nice kick, or try a Mexican blend for varied flavor.
- → How do I store and reheat leftovers?
Store cooled quesadillas in an airtight container in the refrigerator for up to 3 days. Reheat in a skillet over medium heat or in a 350°F oven until crisped and heated through.
- → Can I make these gluten-free?
Absolutely. Use certified gluten-free tortillas and check that your cheese and other ingredients are gluten-free. The taste and texture remain delicious.
- → What can I serve with black-eyed pea quesadillas?
Classic pairings include salsa, guacamole, sour cream, or pico de gallo. A side of Mexican rice or a simple green salad complements the meal nicely.
- → Can I make the filling ahead of time?
Yes, prepare the mashed black-eyed pea mixture up to 2 days in advance and store it refrigerated. Let it come to room temperature before assembling and cooking the quesadillas.